Attending a highly sophisticated event means your personal presentation needs to be totally immaculate from head to toe. Leaving your hair hanging down guarantees it will flatten out or get tangled in your formal jewelry before the night is over. Mastering true classy formal updo hairstyles guarantees your hair is completely swept up, entirely off your neck, and firmly secured into a gorgeous real shape for the entire evening.
These seven completely pinned classy formal updo hairstyles are actual genuine updos. They rely on incredibly realistic structural mechanics to completely lock heavy hair away from your formal outfits. You can easily execute every single one of these authentic variations yourself in your own mirror before you head out to your elegant party.
Realistic Classy Formal Updo Hairstyles For Your Evening
A real updo requires securing the entirety of your length flush against the head. Incorporating these seven highly doable variations into your prep routine provides a beautiful fully locked down aesthetic built on real world techniques.
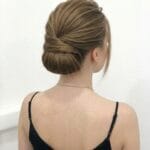
The Interwoven Double Twist
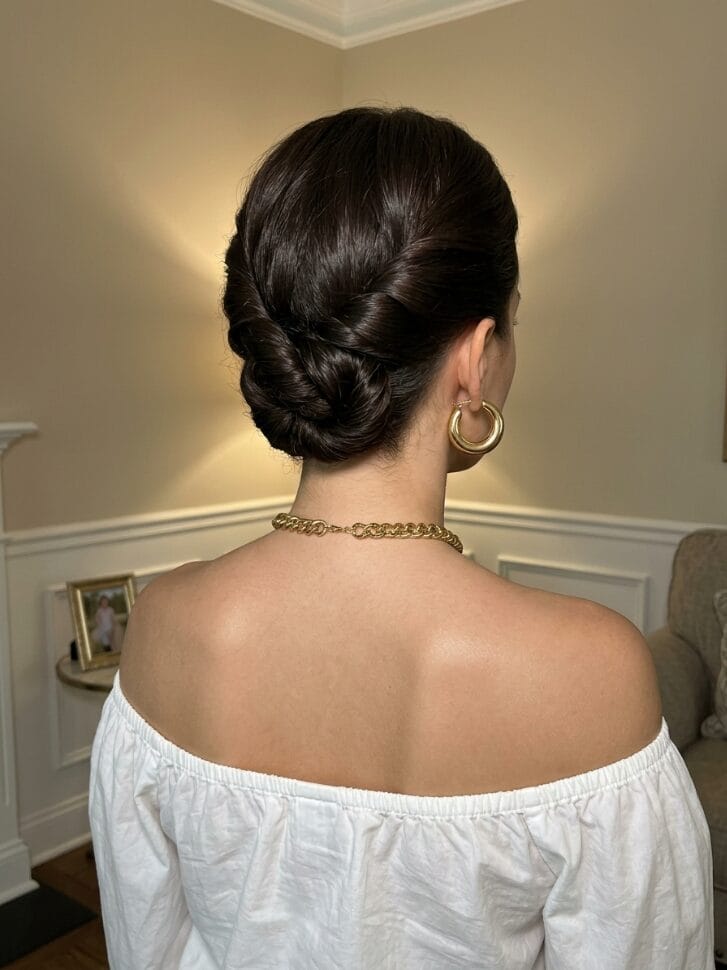
Divide your hair straight down the middle into two even sections at the back of your neck. Twist the left section completely to the ends and pin it flat across the bottom of your scalp. Twist the right section and lay it directly over the first twist, hiding the ends underneath. This creates a dense elegant shape that is incredibly secure and simple.
| Style Details | Specifications |
| Face Shape | All Face Shapes |
| Required Tools | Strong Bobby Pins |
| Difficulty Level | Beginner |
| Time to Style | 4 minutes |
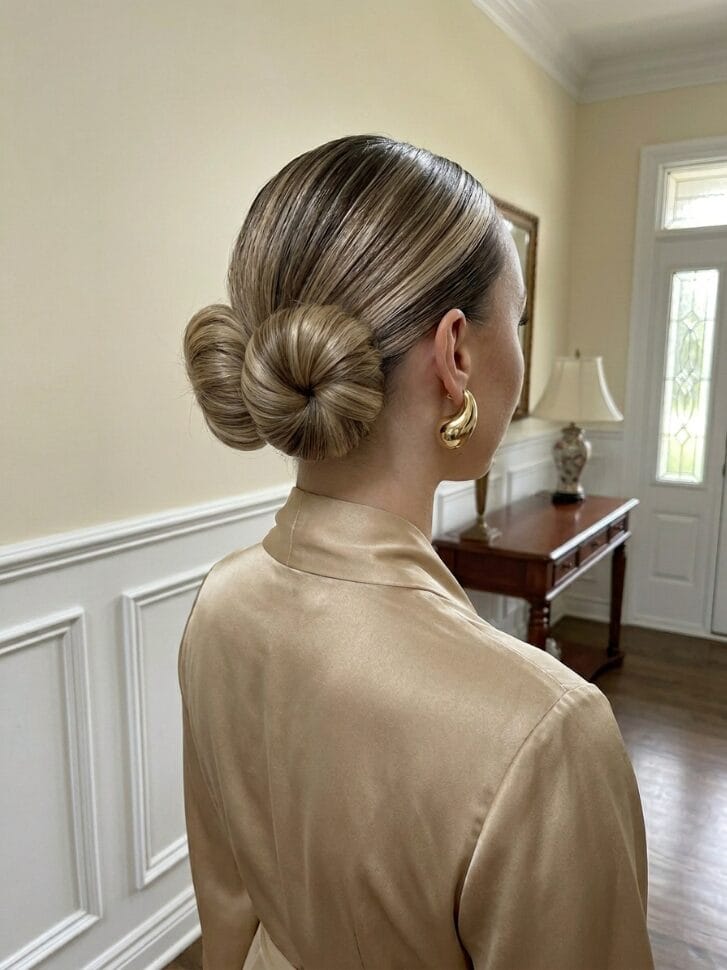
The Sleek Ballet Wrap
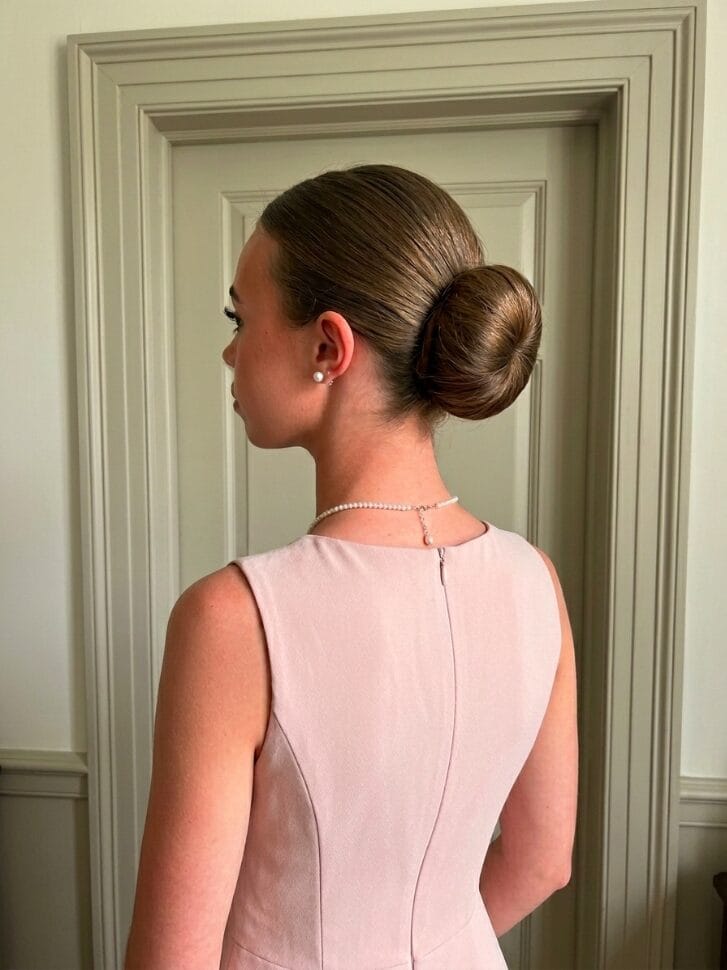
Pull all your hair into a firm ponytail exactly at the center of the back of your head, but leave one thick section of hair out underneath. Twist the main ponytail into a perfectly smooth round bun and pin it flat. Take that loose bottom section and wrap it entirely around the base of the bun to hide the pins and create a flawless finish.
| Style Details | Specifications |
| Face Shape | Round Oval |
| Required Tools | Clear Elastics Pins |
| Difficulty Level | Beginner |
| Time to Style | 5 minutes |
The Stacked Donut Chignon
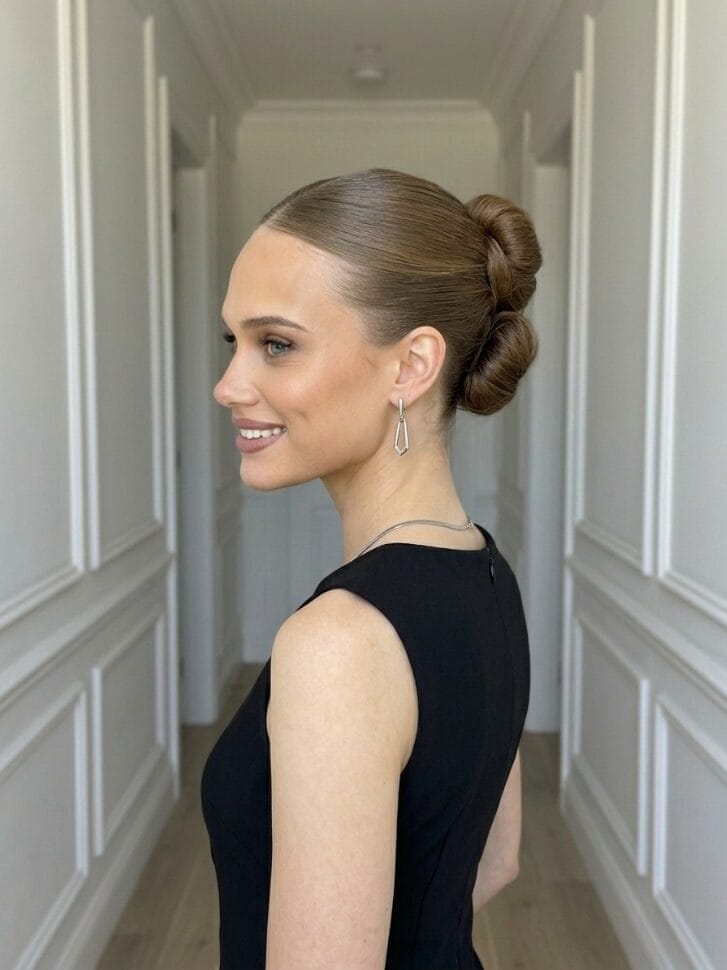
Tie two small ponytails vertically down the back of your head. Slide a small foam styling donut over each ponytail. Fan the hair smoothly over both donuts so the foam is completely hidden, securing each with an elastic. Twist the remaining ends tightly around the bases and pin them flat. This builds massive volume while staying totally off the neck.
| Style Details | Specifications |
| Face Shape | Square Heart |
| Required Tools | Two Foam Inserts |
| Difficulty Level | Beginner |
| Time to Style | 6 minutes |
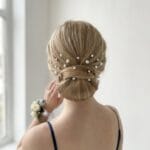
The Pinned Curl Crown
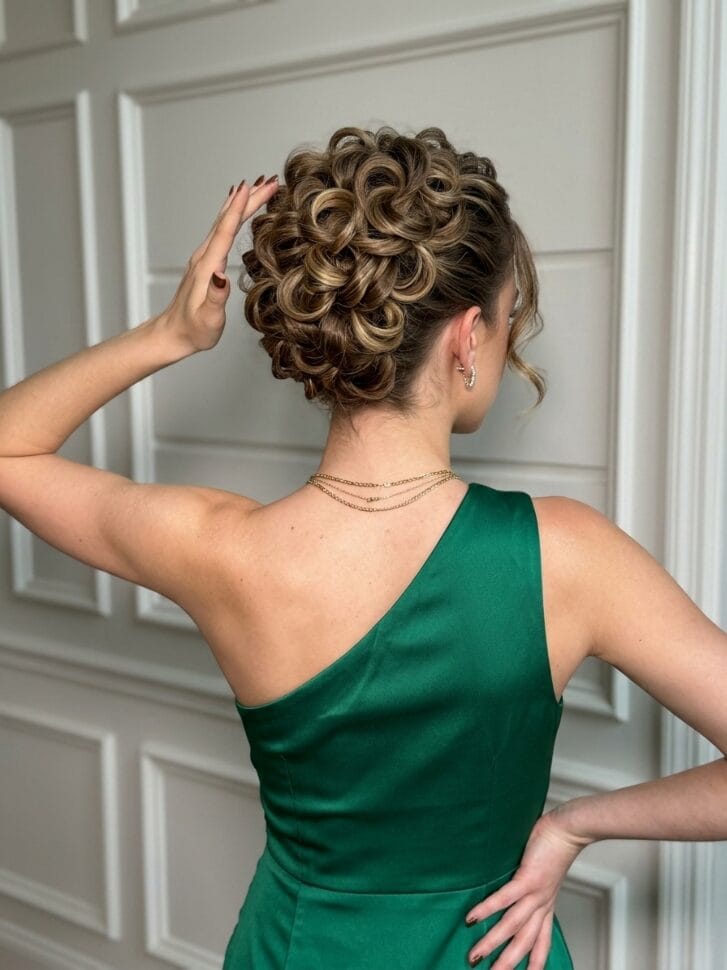
Curl your entire head of hair with a hot iron to build a textured foundation. Instead of pulling it all into one big elastic, grab individual curls one by one and pin them flush against your crown. Building the updo curl by curl creates a deeply romantic traditional aesthetic that fully clears the neck and shoulders.
| Style Details | Specifications |
| Face Shape | Diamond Heart |
| Required Tools | Curling Iron Pins |
| Difficulty Level | Intermediate |
| Time to Style | 10 minutes |
The Reverse Braided Roll
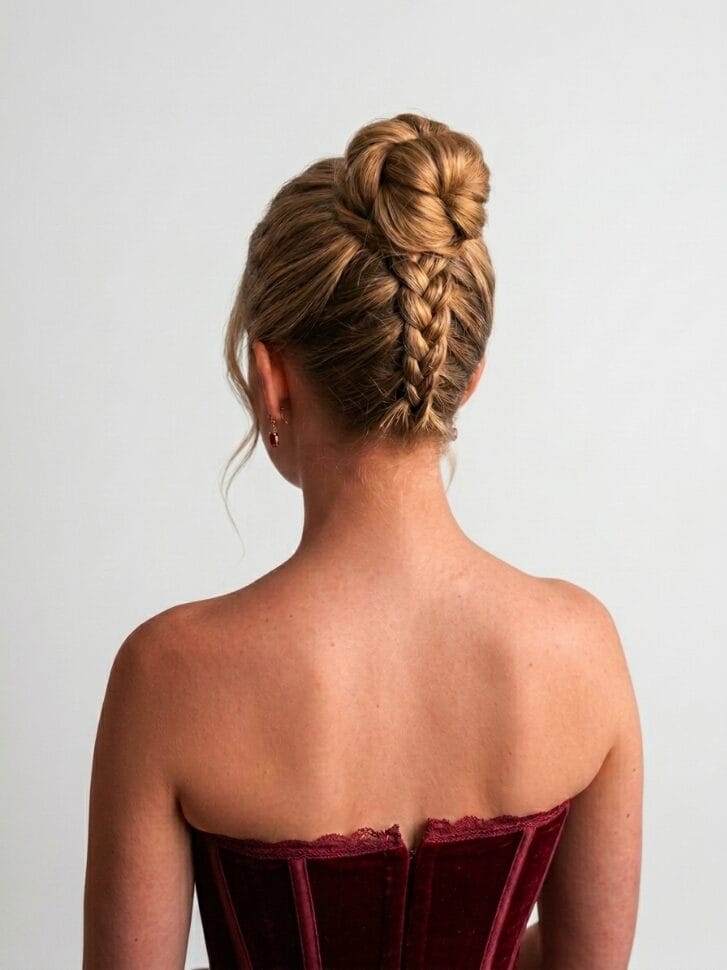
Flip your head upside down and French braid the bottom half of your hair straight up from the nape of your neck. Once you reach the center of your head, gather all remaining hair and tie it into a single ponytail. Roll that remaining ponytail into a classic bun right above the braid for a deeply detailed formal look.
| Style Details | Specifications |
| Face Shape | All Face Shapes |
| Required Tools | Clear Elastics Pins |
| Difficulty Level | Intermediate |
| Time to Style | 7 minutes |
The Folded Nape Coil
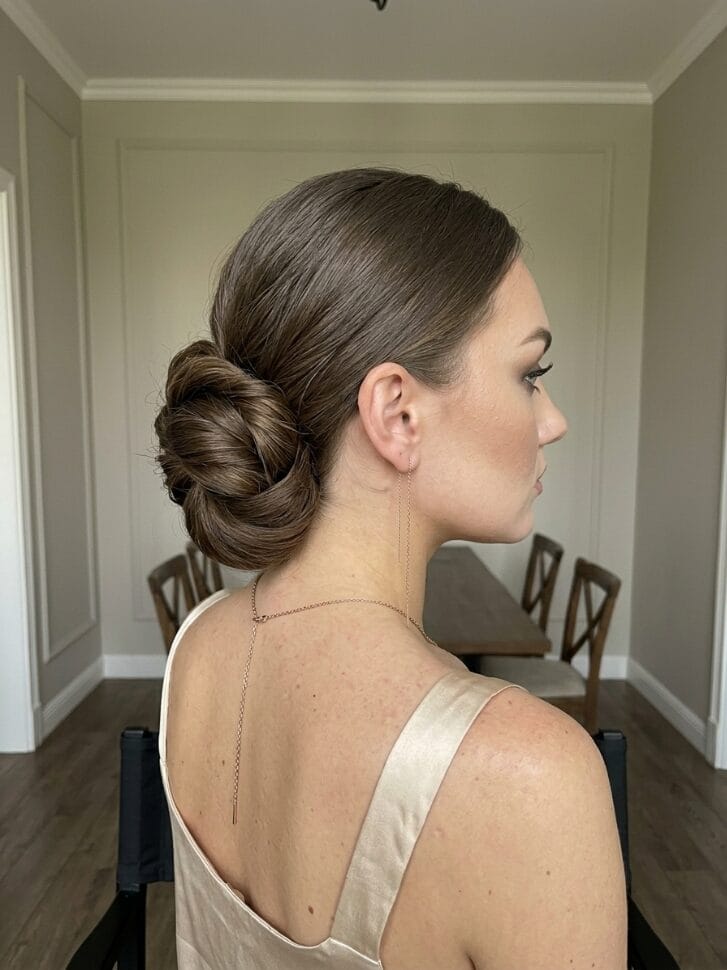
Gather all your hair loosely at the base of your neck. Twist the entire mass tightly to the right until it naturally coils back on itself. Fold that thick twisted coil directly in half so it sits horizontally across your lower neck. Drive heavy pins straight through the folded seam to lock the wide shape flush against your scalp.
| Style Details | Specifications |
| Face Shape | Round Oval |
| Required Tools | Heavy Bobby Pins |
| Difficulty Level | Beginner |
| Time to Style | 4 minutes |
The Knotted Ribbon Updo
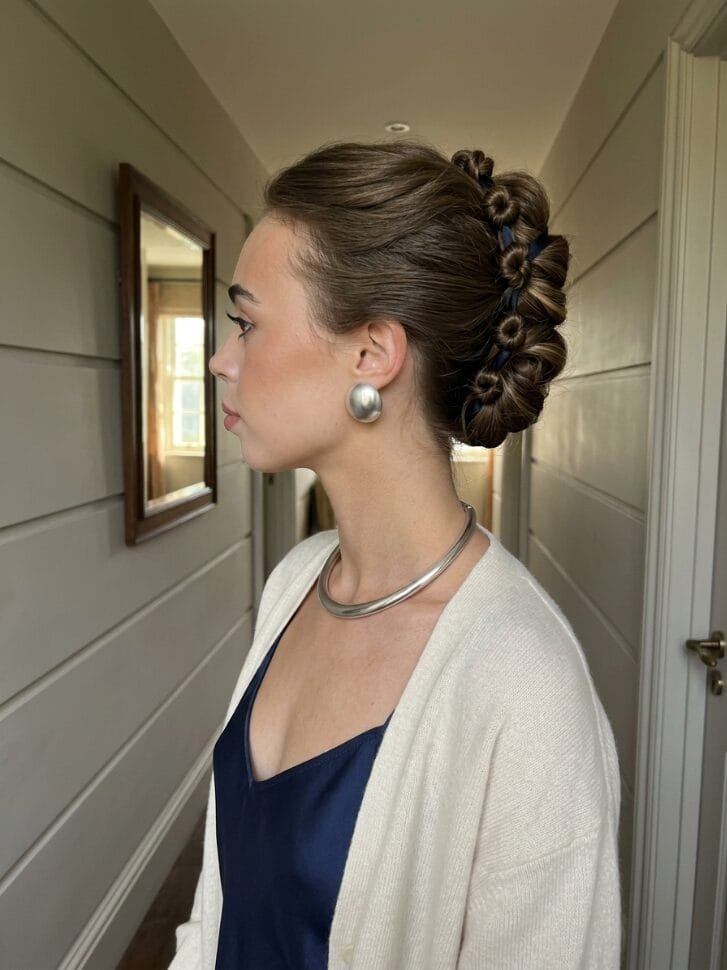
Divide your hair vertically into four small sections down the back of your head. Take a single piece of thin silk ribbon and tie it into the top section. Working your way down, tie the hair and the ribbon together into literal shoelace knots, pinning each knot flat as you go. This forms a totally unique vertical cluster of hair completely secured to the head.
| Style Details | Specifications |
| Face Shape | Square Oval |
| Required Tools | Silk Ribbon Pins |
| Difficulty Level | Intermediate |
| Time to Style | 8 minutes |
Pro Tips For Doable Styling Efficiency
Keeping every single strand of your hair pinned up through hours of an elegant event requires smart reinforcement. Fast prep routines just need a few minor tweaks to keep your bun completely locked tight and totally polished.
Deploy Heavy Duty Interlocking Hardware
Standard decorative slides will slip right out of your hair when supporting the full weight of a true bun. You must use thick matte finish heavy duty bobby pins that aggressively bite into the strands. For maximum security, push one pin firmly into the updo, then push a second pin directly across it to form an X shape that interlocks the metal and securely traps the hair against your scalp.
Utilize Dry Texturizing Spray For Grip
Freshly washed slippery hair simply will not hold a coiled bun or a twisted roll gracefully. The strands will literally slide right out of the pins. You need to blast your roots and mid shafts with a dry texturizing spray to build the gritty friction required for the hair to actually stay pinned up. Spraying a little extra directly onto your fingertips before twisting the bun gives you massive control.
Common Mistakes To Avoid
Relying On Plastic Claw Clips
Tossing your hair into a fragile visible plastic clip before stepping out guarantees it will clash with your formal wear and snap when you lean back. If you want a completely secure elegant look, you must strictly commit to using actual hidden metal pins to lock your bun safely in place so the style looks genuinely elegant.
Styling Damp Hair
Arriving at the venue with damp hair forced into a dense bun will ruin the shape entirely as it shrinks while drying. Wet hair stretches, meaning once the moisture evaporates, your tightly pinned style will loosen up and begin to sag. You must aggressively blow dry your hair one hundred percent before you attempt to construct your updo.
Frequently Asked Questions
How do I manage flyaways without looking greasy at a formal event?
Keep a clear brow gel wand in your evening bag. You can instantly swipe down rogue baby hairs flat against your scalp right before taking photos. The clear gel sets instantly and completely avoids the heavy oily shine that normal hair serums leave behind.
Will these tight buns cause severe tension headaches while socializing?
Discomfort solely comes from pulling the very front hairline too tight. You must pull the back hair securely, but right before you tie the starting elastic or begin twisting, gently massage and loosen the strands specifically around your temples and forehead to relieve the physical tension on your skin.
Can I achieve the stacked chignon if my hair is incredibly thin?
Yes, using the foam donuts completely creates the illusion of massive volume. You just need to fan your natural hair smoothly over the foam before you pin it flat. This technique completely masks thin hair and creates a dense visual updo.
Do I need to use hard hold hairspray for an indoor formal event?
Pins hold the heavy internal physical structure, but hairspray stops environmental humidity and indoor heating static from making you look fuzzy under bright lights. You must douse your finished bun in a hard hold aerosol spray to freeze the sleek silhouette in place.
Conclusion
Mastering these completely realistic classy formal updo hairstyles means you can enjoy the entire event with absolute confidence. Use these incredibly secure highly doable genuine bun methods to completely clear your neck and project a purely stunning aesthetic all night long.